Overtime / Time Off in Lieu
Employees may be required to render excess hours beyond the regular work schedule.

Employee: Steps
Employees may request for Overtime in many ways:
Quick Services
- On the Home page, go to Quick Services and click Overtime / TOIL.
- This will redirect to the Overtime request form.
- Choose the date that you intend to file for overtime. This will show the excess hours that you have rendered.
- Click credit as and choose the overtime.
- Complete the reason box.
- Review the information provided.
-
Click Submit and this request will be sent to your Manager for processing.
Note: The attachment is optional, depending on the internal arrangement of your team.
Request Page
- On the Home page, go to side bar and click Request.
- Click File a Request and choose Overtime/ TOIL
- This will redirect to the Overtime request form.
- Choose the date that you intend to file for overtime. This will show the excess hours that you have rendered.
- Click credit as and choose the overtime.
- Complete the reason box.
- Review the information provided.
-
Click Submit and this request will be sent to your Manager for processing.
Note: The attachment is optional, depending on the internal arrangement of your team.
Home Page - Top Application
- On the Top Application, choose file Overtime
- This will redirect to the Overtime request form.
- Choose the date that you intend to file for overtime. This will show the excess hours that you have rendered.
- Click credit as and choose the overtime.
- Complete the reason box.
- Review the information provided.
-
Click Submit and this request will be sent to your Manager for processing.
Note: The attachment is optional, depending on the internal arrangement of your team.
Manager: Pre-approved Overtime
Managers may file a planned overtime for his staff or the entire team , if needed.
Planning for the team's overtime
- On the Home page / Top Application, choose Pre-approved Overtime icon.
- You will be redirected to the Pre-approved Overtime form.
- Choose the employee name you plan to pre-approved overtime for.
- Select the work date
- Overtime type.
- Indicate the number of hours and minutes of the overtime.
-
Click Submit.
Note: Once submit, this will send notifications to the employees through email and the system.
Tip: If an employee has worked more than the pre-approved extra hours and the Manager has given his or her approval in principle, the employee may submit a post-shift overtime request.
Pre-approved overtime will base it's computation on the actual number of hours rendered by the employee.
Processing of Overtime Request
For every request submitted by an employee, the Manager will receive an email and system notification.
A. Request Page
- On the Manager's view, click the side bar and choose Request.
- This will be redirected to the consolidation page of all the Requests
- The request page displays an hour glass badges to help the Manager know what requests are waiting for approval.
- To process, click a Request and this will proceed to the request's detail page where the Manager can review the information about the request.
- After reviewing, the Manager can process the request by clicking approve or reject on the belt menu (above the page).
B. Statistics
- On the Homepage, you will see Statistics section.
- You can see from this section if you have pending requests that needs to be processed.
- Click on View Details and this will redirect to the Request page.
- To process, click a Request and this will proceed to the request's detail page where the Manager can review the information about the request.
- After reviewing, the Manager can process the request by clicking approve or reject on the belt menu.
Processing of Multiple Request
- On the Manager's view, click the side bar and choose Request.
- This will be redirected to the consolidation page of all the Requests.
- The request page displays an hour glass badges to help the Manager know what requests are waiting for approval.
- To process multiple Requests, click on the request and this will proceed to the request's detail page. Click on Process button on the right panel.
- This will be redirected to a modal where you can see the various dates of the requests. You may process this individually or by batch.
- After reviewing, the Manager can process the request by clicking approve or reject on the belt menu.
Other Feature
Filter
- The requests may be filtered by choosing the status on upper right panel.
Choose to display - All requests, Pending requests and Done or Processed requests. - You can filter by Date - choose a specific date or range date
- You can filter by Category - choose by Employee Name, Job Title, Department, Team and others.
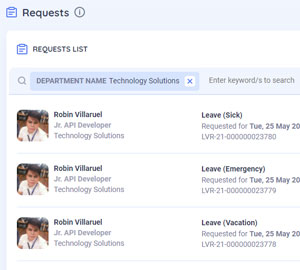
Affiliate Search
- On the top part your Request page, you can search Requests based on categories.
- Click on the blank field and choose a category. Click again to type on your keyword.
Last Leave Taken
- Before processing the request, the Manager may review the previous requests of the employee.
- On the right panel of the Leave Request Form, you will see the last 5 dates when the employee has filed for Leave.

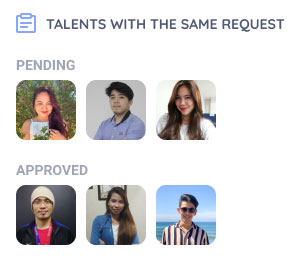
Talents with same Request
- To help the Manager make a decision in processing a request, the system displays the other employees with the same request on the same date, including the status of the requests.